Stardew Valley Fish Ponds: Your Gold Problem Solved

You’re deep into Stardew Valley, maybe struggling to afford that next farm upgrade or just tired of constant crop maintenance. Fish ponds look cool, sure, but are they actually worth the bother? Too many players ignore them, leaving serious passive income on the table.
Stop Wasting Space: Why Fish Ponds Matter
Don’t be that farmer who dismisses fish ponds as cosmetic. They are a significant, consistent source of passive income and critical crafting resources. You need to stop thinking of them as a novelty and start treating them as a core part of your farm’s economy. Farming crops is great, but it’s daily work. Animals demand feeding. Fish ponds? Set them up, do a few quests, then mostly just collect. That’s efficiency, plain and simple.
You’ve got limited farm space. Every tile should contribute. A fish pond, especially once fully upgraded, pumps out valuable items without needing your constant attention. It’s a reliable stream of gold you don’t have to sweat for. Compare that to the effort of growing hundreds of cranberries or pumpkins. Ponds are a long-term investment that pays off big time, freeing you up for mining, fishing, or just decorating your farm. It’s about working smarter, not harder. If you’re not using them, you’re leaving money on the table. Plain and simple.
Early Game Profit vs. Late Game Resources
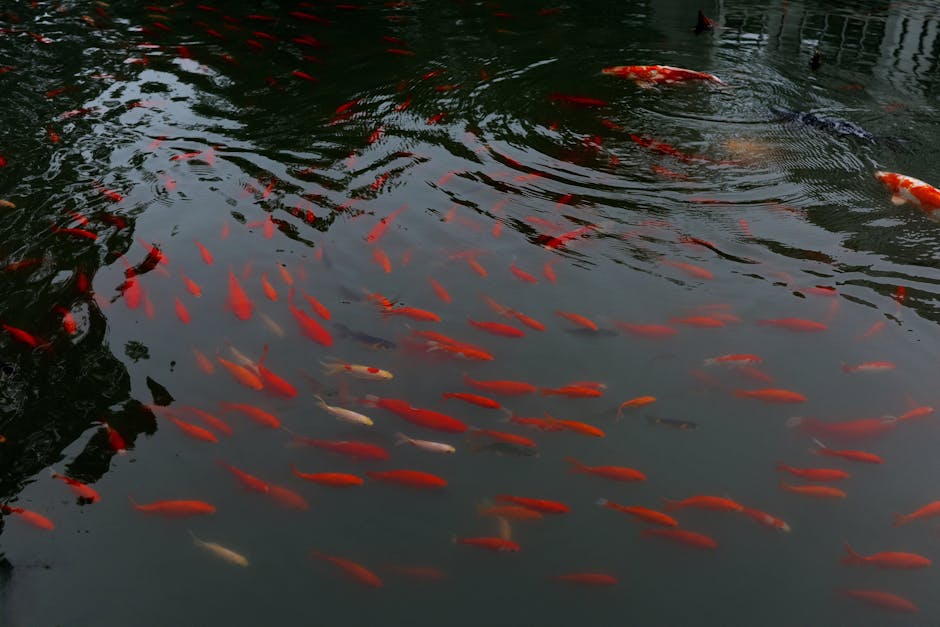
Early on, you’re chasing every gold piece. A pond, even with basic fish like Sardines or Anchovies, starts generating some roe and basic items. It’s not huge cash, but it’s a start. The real power comes later. Think high-value roe that turns into aged roe, or unique items specific fish drop. Octopus ponds? They drop Omni Geodes. Crayfish? Crabs. These aren’t just for selling; they’re for crafting, bundles, or gifts. That’s versatility you won’t get from a patch of corn. The return on investment for the initial pond cost, 5,000g and 200 stone, is ridiculously good once you get premium fish in there.
Passive Income: The Real MVP
This is the core appeal. Once a pond is stocked and upgraded, fish reproduce, and they drop items. You check it once a day, maybe twice. Collect the roe, collect the other drops, sell them. That’s it. No watering, no harvesting, no processing through artisan machines unless you choose to age the roe (which you absolutely should for maximum profit). This low-maintenance income stream lets you focus on other, more active pursuits like mining for valuable ores or exploring Ginger Island. It frees up your time, which is the most valuable resource in Stardew Valley. Don’t underestimate how much gold a few fully stocked, high-value fish ponds can generate daily without your constant intervention. It changes the game.
Best Fish for Early Profit: Don’t Overthink It
Forget the common fish. If you’re setting up a pond, you’re doing it for profit or specific resources. So, pick the right fish from day one. Don’t waste time with basic ocean fish unless you absolutely need their specific roe for a recipe. You want the highest value, fastest reproducing, or most useful item-dropping fish. Period.
Sturgeon: Roe to Caviar
Sturgeon are your go-to for serious profit. Their roe isn’t just “aged roe”; it’s Caviar. Caviar sells for 500g, or 700g with the Artisan profession. That’s a huge bump from regular aged roe. A pond full of Sturgeon will generate Caviar regularly. You catch them in the Mountain Lake during Summer and Winter, between 6 AM and 7 PM. Get a few, stock your pond, and aim for 10 fish. The quests might ask for a few specific items, but they’re usually easy. Once at 10, they’ll produce roe and sometimes other useful items like Nautilus Shells. Caviar is one of the highest-value artisan goods, making Sturgeon ponds a top priority for gold generation.
Lava Eel: High-Value Roe, Tough Catch
Lava Eels are a pain to catch. You find them in the Mines (level 100) or on Ginger Island (Volcano Dungeon, Forge). But the effort is worth it. Their roe sells for 200g, aging up to 280g. Not Caviar-level, but still excellent. More importantly, Lava Eels also drop Spicy Eels, Magma Geodes, and Gold Ore. The Spicy Eels provide a significant buff (+1 Speed, +100 Max Energy), making them incredibly useful for mining runs. Don’t ignore the utility here. You’ll need high fishing skill and good bait, maybe even an enchanted rod, to land them consistently. But once you’ve got a couple for your pond, the passive income and resource drops are fantastic. Aim for a full pond of 10.
Blobfish: Best for Late Game Sales
Blobfish are a bit of a late-game play, as you can only catch them at the Night Market submarine or using Magic Bait on Ginger Island. However, their roe is the highest-value regular roe, selling for 300g and aging to 420g. That beats Lava Eel roe easily. They also sometimes drop Blobfish, Pearl, and warp totems to the Beach or Farm. The Pearl is rare but sells for 2,500g, making it a huge bonus. If you have access to the Night Market or Magic Bait, Blobfish ponds are absolute goldmines. They are low-maintenance, high-reward.
Specifics: A Quick Look at Roe Values (Base / Aged)
| Fish Type | Base Roe (g) | Aged Roe (g) | Notes |
|---|---|---|---|
| Sturgeon | 150 | 500 | Caviar. Big money. |
| Lava Eel | 200 | 280 | Good profit, useful item drops. |
| Blobfish | 300 | 420 | Highest regular aged roe. Late game. |
| Octopus | 200 | 280 | Omni Geodes and other unique drops. |
| Rainbow Trout | 100 | 140 | Small chance for Prismatic Shard. |
Setup Essentials: What You Actually Need
Building a fish pond isn’t complicated, but doing it right saves you headaches and maximizes profit. You need stone, and you need to understand the upgrade process. Don’t just plonk it down anywhere; think about your farm layout and access.
First, you buy the pond recipe from Robin at the Carpenter’s Shop for 5,000g and 200 Stone. That’s your entry fee. Once built, you’ll need to catch and deposit fish. The pond starts with a capacity of 3 fish. To increase this, the fish inside will periodically give you a “quest” asking for specific items. These items vary by fish type. For example, a Sturgeon pond might ask for two Largemouth Bass and 10 Seaweed. Fulfill the quest, and the pond capacity increases. This happens until the pond reaches its maximum capacity of 10 fish. This upgrade process is crucial and often overlooked. You can’t just dump 10 fish in initially; you have to earn those slots.
Pond Placement and Upgrades
Where you put your pond matters. Place it near your processing area if you’re aging roe, or near a high-traffic path for easy collection. Don’t bury it in a corner you never visit. Accessibility is key. Upgrades are automatic once you fulfill the quests. There are three capacity upgrades: 3 to 5, 5 to 7, and 7 to 10. Each requires different items. The quests are generally straightforward, asking for common items, specific fish, or sometimes gems. Just keep an eye on the pond’s speech bubble; that’s your cue. Each upgrade costs a few items, but zero gold, which is a steal for the increased yield. Prioritize getting your high-value fish ponds to 10 capacity as fast as possible.
Maxing Out Fish Capacity
Getting to 10 fish capacity isn’t just about more fish; it’s about better item drops. Many fish, especially the rare ones like Lava Eel or Blobfish, only start dropping their most valuable unique items (like Magma Geodes or Pearls) once the pond is full or nearly full. A pond with 10 fish also increases the frequency of roe production. If you’re serious about making gold, a pond at anything less than 10 fish capacity is underperforming. It’s a simple math problem: more fish equals more production. Don’t be lazy about those upgrade quests. They are investments in future income.
Quests: Don’t Ignore Them
Seriously, those pond quests are not optional fluff. They are the gatekeepers to maximizing your fish pond’s output. Every time you see a speech bubble above a pond, interact with it immediately. It’ll tell you what the fish need. Sometimes it’s easy: a few basic ores, some common fish. Sometimes it’s a specific gem or a rarer fish. Always keep an inventory of common items like wood, stone, and different fish types, just in case. Fulfilling these quests quickly means your pond upgrades faster, reaches max capacity sooner, and starts pumping out maximum profit and resources. Delaying a quest means delaying your income. It’s that simple.
Optimizing Output: It’s All About the Items

You’ve got your fish, your pond is maxed. Now, what about those extra items fish drop? This isn’t just about roe. Specific fish drop specific things, and knowing what to expect is half the battle. This directly impacts your daily income and resource gathering.
How Do Fish Pond Items Work?
Beyond roe, fish ponds can yield a variety of items. These “extra” drops typically occur more frequently as the pond’s population grows, especially once it hits 10 fish. The specific items depend entirely on the type of fish you’ve stocked. For example, a Crab pond will occasionally drop Crab, Seaweed, and even the rare Crab Pot. A Woodskip pond might give you Hardwood. These items aren’t always valuable in terms of raw gold, but they can save you time and effort in gathering resources, or provide ingredients for crafting. Some, like the Omni Geodes from Octopus ponds or Prismatic Shards from Rainbow Trout (rarely!), are highly valuable. Don’t just focus on the roe; the secondary drops are often just as important, if not more so, for overall farm progression and wealth.
What Items Should I Prioritize?
Prioritize based on your current farm needs. If you’re constantly running low on wood for crafting, a Woodskip pond could be a smart move. If you’re trying to complete the museum or need specific geodes, an Octopus pond is excellent. For raw gold, focus on fish that drop high-value items or roe. The drops aren’t guaranteed every day, but a full pond increases the chances. Think strategically:
- Gold/Gems: Blobfish (Pearls), Rainbow Trout (Prismatic Shards – super rare), Lava Eel (Magma Geodes).
- Resources: Woodskip (Hardwood), Crab (Crab Pots, Seaweed), Flounder (Seaweed).
- Food/Buffs: Lava Eel (Spicy Eel).
- Special: Octopus (Omni Geodes), Squid (Ink).
Knowing what each fish can potentially drop helps you decide which ponds to invest in beyond just their roe value. It’s about diversifying your passive income and resource streams.
What About Special Items?
Some fish ponds offer genuinely unique or rare items. The most notable are the Prismatic Shard from Rainbow Trout (extremely rare, but possible!) and Pearls from Blobfish. These are game-changing drops that can net you huge amounts of gold or unlock powerful enchantments. It’s not a reliable income stream, but the chance is always there. Another “special” item is the Omni Geode from Octopus ponds. Omni Geodes are fantastic for getting various minerals and artifacts, helping you complete the museum and earn extra cash. So, while you might not fill your farm with Rainbow Trout ponds expecting a daily Prismatic Shard, having one or two high-capacity ponds for these rare drops is a worthwhile gamble. It’s an easy way to get those elusive items without grinding specific activities.
Advanced Strategies: Don’t Just Fill ‘Em Up
Simply stocking a pond isn’t enough. You need a strategy. Are you optimizing for pure gold, specific resources, or a bit of both? Don’t blindly pick fish.
| Goal / Fish Type | Sturgeon (Caviar) | Lava Eel (Roe/Buffs) | Blobfish (High Roe/Pearl) | Octopus (Omni Geodes) | Coral/Sea Urchin (Artisan) |
|---|---|---|---|---|---|
| Pure Gold | Top | Strong | Excellent | Moderate | Strong |
| Resources | Weak | Strong | Moderate | Top | N/A |
| Buffs | Weak | Top | Weak | Weak | N/A |
| Rarity Hunt | Weak | Weak | Strong | Strong | N/A |
| Ease of Catch | Good | Hard | Very Hard | Hard | Easy |
This table simplifies your choices. You can’t just pick one fish and call it a day. A diversified portfolio of ponds is the smart move. If you only care about gold, load up on Sturgeon and Blobfish. If you need resources for crafting or combat, Lava Eels and Octopus are essential. Think about what you’re lacking.
Single-Species Ponds vs. Mixed Goals
Don’t mix fish in a single pond. That’s a rookie mistake. Each pond needs to be dedicated to a single species to maximize its specific output. Trying to put different fish in one pond won’t work anyway; only the first type of fish added will reproduce. The question is, how many ponds of which species do you need?
For pure profit, you want multiple Sturgeon ponds for Caviar and Blobfish ponds for their high-value aged roe. These are your cash cows. They should take up the most space if gold is your primary driver.
For resource management, dedicate a pond or two to Octopus for Omni Geodes, and another to Lava Eels for the Spicy Eels and Magma Geodes. These aren’t necessarily max-gold producers, but they save you immense time and effort in other game aspects. A single Woodskip pond can keep you supplied with Hardwood if you hate chopping logs in the Secret Woods. It’s all about balancing your gold goals with your resource needs. Don’t be rigid; adapt to what your farm needs most at any given time.
The Coral and Sea Urchin Loophole
Here’s a tip many overlook: Coral and Sea Urchin ponds. You literally just drop them into a pond, and they start reproducing. No fishing required. They’re found on the beach, or you can buy them from the Traveling Cart. Their base value isn’t great, but as “fish” products, their roe counts as Artisan Goods. This means if you have the Artisan profession (Farming Level 10), their roe sells for 1.4x more.
Why is this a “loophole”? Because they’re incredibly easy to obtain and require zero fishing skill. You can set up multiple ponds of these early game for a modest but consistent passive income, especially if you rush the Artisan profession. They’re not going to make you rich like Caviar, but they’re reliable, low-effort income, particularly if you’re struggling to catch the harder-to-get high-value fish. It’s a solid stepping stone to bigger profits. Don’t sleep on easy money.
The Real Takeaway: Simplify Your Grind
Fish ponds are not optional; they are a critical tool for automating income and resource generation in Stardew Valley. Prioritize high-value fish like Sturgeon and Blobfish, don’t ignore the upgrade quests, and use ponds strategically to solve your specific gold or resource shortages.
Related Post

Itch Flea Treatment Reviews 2024: Reliable Protection for Pets on the Move
The scratching starts in the backseat of the SUV, somewhere between the winding roads of [...]
Best Aquarium Filter for 30 Gallon Tank: 2024 Reliability Review
You are standing in the security line at the airport, shoes off, laptop out, and [...]